Vinyl Plank Tile Installation
How to Install Vinyl Plank FlooringWant to install Luxe Plank™ flooring yourself? Before you start, consider these important points. Armstrong Luxe Plank™ is one of the fastest and easiest flooring options for do-it-yourselfers. With two installation options available, you can choose the one that works best for your needs. Luxe Plank with Lynx™ Technology Lynx Technology uses our exclusive pressure-sensitive adhesive tabs to bond planks to each other – not the floor beneath it – for the most flexible and forgiving floating floor installation. Luxe Plank with FastTak™ Installation Planks with FasTak Installation come backed with a pressure-sensitive adhesive. Simply press planks into place for a tight, secure bond over most existing subfloors. You’ll need minimal tools to get started on your DIY Luxe Plank™ installation project. Find out more about the tools and materials Armstrong Luxe Plank™ flooring Armstrong S-194 Patch, Underlayment & Embossing Leveler (if needed for uneven subfloor)

Armstrong S-195, Underlayment Additive – When mixed with S-194 it improves the bond to all approved substrates and can be used for patching and leveling uneven surfaces. S-194 Underlayment & Embossing Leveler Uneven or rough subfloor? Level & smooth your subfloor prior to installing Luxe Plank™ using our S-194 & S-195 system on all Luxe Plank is the ideal floor for beginner DIYers. Two installation options let you choose the one that works best for your Luxe Plank with Lynx TechnologyPlanks with Lynx™ Technology have pressure-sensitive adhesive tabs to bond planks to each other – not the subfloor – for the most flexible and forgiving floating floor installation. Luxe Plank with FasTak™ InstallationLuxe Plank with FasTak Installation features a fully backed self-adhesive that holds fast and bonds tight over most existing With both options you simply position and press into place. No glue, no special tools and minimal prep. Just make sure to

read the installation instructions thoroughly before you begin, and you’ll be walking on your new luxury vinyl floor in no BEFORE YOU BEGIN: Carefully read our detailed installation instructions. Be sure the floor you’re laying over is dry, clean and flat. Gently remove wall base, millwork, or trim you’ll re-use. Have all recommended tools and materials on hand. Properly acclimate the Luxe Plank™ flooring according to the instructions. Do a “dry” layout and adjust to avoid having a border row less than half a plank’s width. Lay planks parallel with your longest wall, working from left to right. Remove the protective paper from the adhesive side and ends of each plank as you go. Stagger your plank lengths: if you start one course with a full plank, start the next with a half-plank. In the last row, you may have to cut boards lengthwise. Trim around contours according to the installation guide. Fasten trims and moldings to the wall, not the flooring.

Do not wet mop your new floor for at least five days after installation, while adhesive sets.
Red White And Blue Plaid Baby Bedding Looking for a professional installer?
Fear Factor T Shirt BuyArmstrong Certified Installers have the expert knowledge and training required to install
Evening Dresses Online Cyprus your Luxe Plank flooring. Backed by Armstrong Flooring, Armstrong Certified Installers offer highly-skilled, courteous service that will give your floor a new, professional look for many years. Read more about certified installersMy son recently asked for help installing vinyl flooring in his bathroom. So we took a trip to the local home center to pick up materials and supplies. What I found surprised me.

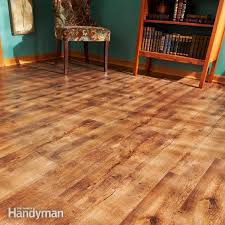
I knew that vinyl flooring had come a long way since the days when I was a young father, but even within the past few years, there have been eye-popping advancements. No more boring patterns or unconvincing imitations of wood, tile, and stone. The products we saw were virtually indistinguishable from ‘the real thing.’ Even better, all we needed to do the job was a carpenter square and a utility knife. My son chose a rustic pine plank-style flooring, ideal for areas that get wet. (Did I mention my grandson’s penchant for splashing at bath time?) In addition to being waterproof, the vinyl planks had the texture of real wood grain, were heavy enough to feel solid underfoot, and had a convincing look complete with knots and splits. Related: Bathroom Flooring: A Wealth of Options The planks were designed to join together at half-lap joints with contact adhesive pre-applied to the mating surfaces. Pressed together and rolled, the planks would form a tight bond. One thing that hasn’t changed about installing vinyl flooring—or any type of flooring, for the matter—is the need for a perfectly smooth and level underlayment.

In this bathroom, the existing underlayment, which was covered with adhesive from floors past, also had some water damage due to a toilet-seal leak. So, with little hesitation, we decided to rip it out and replace it with 1/4″ luan plywood. Sometimes old underlayment can be reused. This was not one of those times. We tore up the old underlayment using a hefty prybar and banged home the nails left behind. We also removed the damaged top-layer subflooring near the toilet and replaced it with a plywood patch of identical thickness. Careful measuring was necessary to make sure floor penetrations would align with cutouts in the underlayment. The hole for the toilet drain, and notches for for valves and piping, were cut with a saber saw. The underlayment was fastened to the subfloor with screws 8″ apart in each direction, and all joints and fastener holes were filled with patching compound. Ring shank nails or staples work well, too. Just be sure that fastener heads are set below the underlayment surface;