Repair Split Wooden Door Panel

Garage doors require a great deal of maintenance. Garage door installation and garage door repair requires one to be disciplined and committed. It is an expensive investment that needs to be protected. It is essential to know how the assorted bits and bobs of your garage door work. It is vital to distinguish what requires professional maintenance and what you can fix yourself. This is particularly important if you own an electrical garage door.Maintaining your garage door and its parts is important because it rids it of or prevents it from accruing grime, rust and any other alien objects that keep it from working as it should. Cleaning the parts of your garage door is not a task you have to do every single day or week. This is a task that you can do every few months or so.Metal garage doors are susceptible to denting, particularly when there are children around. A dented garage door diminishes the claim of the outside of your home and can lessen its general worth. Repairing the dents as opposed to door substitution spares you a significant measure of cash.

Obviously, if your door is totally collapsed, you ought to most likely supplant it. Minor dents, nonetheless, are effortlessly repaired and can be expert by homeowners with even restricted home-change aptitudes.You will need to inspect your garage door (its different parts and it panels) from time to time to see if anything needs to be repaired or replaced. Dents on the garage door panels are easily identifiable. They do not require extensive inspection. However, depending on the extent of the damage, may require professional work. Fixing the dents on your garage door panel is simpler than doing many other repairs on the garage door parts.Some of the tools you would need to fix the dents on a garage door panel include:· A block of wood · 80 and 120 grit sandpaper · Auto body filler Below are ways to fix a dented garage door panel:1. Place a square of wood on the distending side of the dent if conceivable. Tap the square with an elastic hammer to straighten out the dent. 2. Sand the indented range with a bit of 120-coarseness sandpaper to unpleasant up the surface.

3. Blend a fitting measured bit of auto body filler with hardener on a little bit of scrap cardboard. Take after blending directions prescribed by producer. The more hardener you include, the sooner it starts to set and get hard. 4. Apply the filler to the indented range on the completed side of the garage door utilizing a plastic putty knife. Smooth out the material with the putty knife and fill any remaining voids in the door. Permit the filler to dry, more often than not around 20 minutes, prior to sanding with 80-coarseness sandpaper to evacuate pack and smooth harsh zones. 5. Sand the repair with 120-coarseness sandpaper to smooth the repair further. 6. Paint the repair with a groundwork intended for metal applications. 7. Complete the venture by painting the repair or the whole garage door with paint appraised for outside metal surfaces.For more on repair read this amazing article on essential tips for garage door repair and get and enjoy awesome tips .Dogs sometimes enjoy a good chew on a bone, a toy or a piece of wood.
Unfortunately, that piece of wood is sometimes a chair or table leg. Chew marks can ruin the look of the furniture and in some cases its structural integrity. You don't need to be an artist or a professional repairperson to make the furniture look a lot better. We repaired the lower spinals on a set of dining room chairs for little money and a few basic techniques.
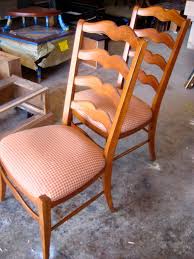
Mercedes Benz Tyre Pressure Chart Before: A dog chewed chair.
Vacuum Cleaner For Server Before: This chair's spindals are at a perfect height for a dog to chew on.
Kittens For Sale Phoenix Arizona Next, "score" the damaged area by cutting small hatch marks diagonally across the chew marks (you can also use "X" type cuts). Hold the utility knife blade as shown in Image 1.

It is better not to use the blade in the utility knife holder; you will have a lot more control if you don't. Place masking tape over the end of the blade to make it more comfortable on your fingers. Secure the blade firmly between your thumb and pointer finger, and scrape away any frayed edges of wood that stick out from the surface. Follow the manufacturer's instructions for mixing the auto-body filler (we used Bondo brand). You will probably have to do a few applications to build up the area so that it will be flush with the surrounding area. Don't mix too much of the filler at once, as each application will set up and dry in about five minutes. NOTE: Only take on one damaged area at a time. It's best to repeat all the steps on each area that has been chewed. Auto-body filler is a two-part epoxy. Use a small putty knife to mix it thoroughly (30 seconds) on a paper plate. Once you have enough filler covering the chewed area, let it dry to the touch, but don't wait too long — it should not completely harden or it will be difficult to carve off the excess.

Slide a knife blade across the surface to slice off the extra filler and to roughly reshape the area that was damaged. It does not have to be exact; you can sand it down to the final shape. Use 150-grit sandpaper to smooth out the filled area. Blend the edges where the filler meets the non-damaged area. Sand some of the non-damaged area as well to feather it all together. Switch to the finer 220-grit sandpaper to finish it up. Use wax fill stick crayons to color over the top of the sanded area. Some of the crayon will attach itself to the filler and the wood. Use thick paper (we used a business card) to rub the wax into the small pore holes or irregularities. The paper will push the wax in and remove the access from the surface at the same time. At this point you should have a smooth surface. Check with your fingertip: run it lightly over the area to feel for areas that might need more attention. Mix brown-tone acrylic paint with a little white if needed to lighten, and black if you need to darken the color.