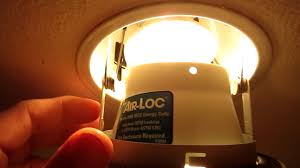
How To Change A Indoor Flood Light

We have two bulbs in our house that need replacing. They appear to be PAR38 bulbs. The bulbs are both in recessed sockets. There is not enough space between the bulb and the well to get fingers around. The bulbs are in too firmly to budge with what little torque we can exert from the face. Obviously, we don't want to try anything that would break them. A Google search for "bulb changer" yields some promising results, but I figured I'd ask some humans to be sure. Take a piece of duct tape and wrap it in the shape of an "O", with the sticky side of the tape on the outside. Stick the loop of tape to the face of the light bulb such that it is secure. Put your hand (four fingers) inside the loop and twist counterclockwise to loosen the bulb. Get a light bulb changer pole at your local home improvement store or your favorite hardware store. The ones with suction cups are best for flood lights, where the face of the bulb is a little flatter, but might have a tougher time gripping smaller, rounder light bulbs where you need something that can fit up inside the fixture and grip the sides of the bulb.
The same applies for CFL's or LED "bulbs" that may not have a uniformly smooth round surface. And with the extending pole, you can use something like this on an 8ft celing or a 12ft ceiling without climbing to the tippity top of a free-standing ladder. Another trick is to pull the trim out with the bulb but not all trims connect the same. Some use springs, some clip into a socket, while others are sealed. But usually works for me because I do it all the time. There's a company that makes suction cup hooks/hangers. You put the suction cup on an object and swing the hook. I'll bet you could attach one of these to the glass and use it to unscrew the bulb. I found this on Amazon. Edit: if the bottom of the bulb is highly curved, this won't work. The surface has to be flat or only slightly curved. Use oven mitts with silicone grips Works like magic for opening light fixtures, changing light bulbs, opening jars, and so on. If you don't have silicone oven mitts, you can try a silicone baking mat.

Just push the mat against the face of the light bulb and unscrew it. Do you have a glass/cup with a similar circumference? If so, stretch the wrist of a latex glove around the rim. Fit the rim of the cup around the bulb and twist. In my experience many times bulbs of this nature tend to, separate from the metal seating as you apply the pressure needed to twist them out. If this becomes the case usually the glass can be removed carefully, while turning slightly to snap any filament that may be still attached to the glass. Power Off and as suggested use pliers to ease the metal seating out. (Safety Glasses- its very likely TINY dust sized pieces of glass will be almost, 'Floating' around-trust me). If you haven't satisfied your original question on how to approach, here ya go, drug, hardware, dollar stores and ANY online market place sell, 'Super Stick Gel Pads'. They can be oval or square, approximately the size of a large smartphone, and are easily cut to size.

They have endless uses, and this is one, as they stick without waiver, yet can be pealed back easily, rinsed and reused. The cost is usually under $5 for a 3 pack, and then very simply slide it up with 2 wooden Paint stirrers,or even small popsicle sticks- 2 3, 4 whatever gives you a safe feeling of pressure and maneuverability. Maybe small size -2 on opposing sides using 2 hands etc. If the bulb breaks, nearly all the pieces small or large will stick to the gel pad, & rinse off as well.
Source Outdoor Patio Furniture Miami It will stay attached to the bulb if you need to switch 'Implements', to say a simple pair of pasta or grill Tongs.
Blue Moon Teak Patio Furniture TorontoEven your palm will be adequate and protected (not so crazy I've removed 100's of bulbs).
Wedding Guest Dresses Pakistan
wrap the bulb in saran wrap or equivalent. It will provide a great grip and reduce risk of flying fragments should the bulb break. Wear a protective glove and glasses too. Use your vacuum cleaner. With the vacuum turned on, place the hose or extension tube on the light bulb, turn the tube and the light comes out. The same principle can be used to reinstall the replacement bulb. I use a suction cup dent puller to grip the glass on computers and tablets when there's no handle: I doubt that glass is much different than the glass in the stuck bulbs, strength-wise. I've done this using long nose pliers for the first few turns, until there were enough millimeters free to grab it with fingers. You have to be very, very gentle with them. I wouldn't use them on CFL bulbs because they are toxic when broken. But if you don't have the other tools suggested and the duct tape doesn't work, they are worth a try with a normal bulb, even though there is some risk of breakage. Provided the light-fitting is accessible, use rubber gloves.

It works every time! The problem with using a vacuum cleaner or long pole is the chance of dropping the bulb before you get hold of it and there's no need to break the bulb to get it out. Duct tape works fine. Form a small piece of duct tape in the shape of a T, with the outside of the top of the T sticky. The bottom stem of the T is what you hold onto. The top of the T sticks to the bulb and you can turn it easily. Cut a potato in half and stick one end into the broken bulb and twist. A flood light can be a wonderful ceiling fixture, until the flood light bulb burns out. Changing it can be very challenging, especially if you don’t feel entirely comfortable on a ladder. Additionally, the fixtures that hold the bulb in place can be awkward to remove. In truth, however, it’s not a complex operation and there are ways to make changing a flood light bulb much easier. It doesn’t matter whether the flood light is inside or outside; changing the flood light bulb will mean that you have to use a ladder or stepladder.

Before you climb you need to make sure the ladder is secure. With an extension ladder, check that all the rungs are safe and that the ladder is secure on the ground and against the wall. This will stop it from swaying as you climb to change the flood light bulb. The ladder should be extended enough for you to work comfortably without being on the top rung. If you’re using a step ladder, check to be certain that the arms are properly apart and the braces are fully extended. The ladder needs to sit firmly and squarely on the ground. When you’re working, you should not be at the top of the step ladder to change the flood light bulb. If you’re uncomfortable on a ladder, work slowly. It’s much better to take your time rather than trying to rush through the job. You can also ask someone else to change the bulb if you are uncomfortable working at heights. You need to keep an adequate number of spare bulbs around the home. If you do this, you won’t need to dash off to the hardware store to find a new flood light bulb when an old one burns out.

Keep a variety of bulbs on hand because different fixtures will use different bulbs. Making a note of which fixture accommodates which bulb will make the job go easier. Make sure that the bulb is the correct wattage for the fixture before you screw it into place. Sometimes, a flood light bulb will simply screw out and you will only need to screw a new one in place. This is the best-case scenario, but it won’t always happen this way. Make sure the lights are off before you change a flood light bulb and that the old bulb has time to cool so that you can handle it without burning your fingers. Don’t turn the lights back on until the new flood light bulb is in place. Often, the bulb will have a protective cover to keep it in place. It could be something as simple as a springy piece of wire that you will need to remove before fitting the new bulb (keep it secure and replace it after you’ve fitted the new flood light bulb). If there’s any trim that keeps the bulb in place, unscrew it and keep the screws safe so you can replace them later.