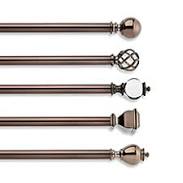
Decorative Curtain Rod Brackets
Rod Desyne Adjustable Curtain Rod Brackets Adjustable brackets from Rod Desyne allow space behind draperies for additional window treatments such as sheer panels, mini blind...s, cellular or roller shades. brackets extend from 3" to 4½" holds up to ¾" diameter curtain rod sold in pairs Metal. Items 1 to 100 of 1061 total 1 1/4" & 1 1/4" Double Strap Bracket~Each 1 1/4" Metal Bracket Extension~Each 1 3/4" & 1 1/4" Double Strap Bracket~Each 1 3/4" & 1 3/4" Double Strap Bracket~Each 1 9/16" Bracket Extension 1 9/16" Bracket Extension for 3/4" Bracket~Each 1" Iron Adjustable Extendable Bracket~Extends 3 1/2" to 5 1/4"~Each 1" Iron Adjustable Extendable Bracket~Extends 4 7/8" to 5 7/8" 1" Iron Adjustable Extendable Bracket~Extends 5 1/2" to 8 1/2" 1" Iron Bracket~3" Projection 1" Iron Elbow Bracket 1" Iron Scroll Bracket 1010 Bracket 3" Projection~Each 1010P6 Bracket 6" Projection~Each 1011 Bracket 3" Projection~Each

10116 Bracket 6" Projection~Each 1021 Bracket 3" Projection~Each 1021S Bracket 1 1/2" Projection~Each 1024 Double Bracket 3" & 6" Projection 1027R Bracket 4" Projection~Each 1027S Bracket 4" Projection~Each 1028 Bracket 6" Projection~Each
Bengal Kittens For Sale In The North West 1028-SQ Bracket 3" Projection~Each
Modern Leaf Shower Curtain 1028EBP Bracket 3" Projection~Each
Custom Wood Shutters And Blinds Yelp 1028HD Bracket 3" Projection~Each 1028HP Horizontal Curtain Rod Bracket~3" Projection~Each 1028HPP Horizont Curtain Rod Bracket~6" Projection~Each 1028WS Bracket 3" Projection~Each 1035 Ceiling Bracket~3" Projection~Each 1036 Double Ceiling Bracket~3" & 6" Projection~Each

1046 Bracket~1 1/2" Projection~Each 2 1/2" Return Steel Bracket for 3/4", 1" or 1 1/4" Curtain Rod Rod 2 5/8" Center Support Bracket for 1 1/4" Rod 2" & 1" Camille Bracket 2" & 1" Morrighan Bracket 2" & 5" Clearance Double Bracket for 1" Rod~Each 2" Clearance Single Bracket for 1" Rod~Each 3 1/2" Bracket ~ Each 3 1/2" Eyelet Bracket for 1 1/4" Rod 3 1/2" Eyelet Bracket for 3/4" Rod 3 1/2" Return Steel Bracket 3 1/2" Return Steel Bracket for 3" Curtain Rod 3 1/2" Square Bracket for 1" Rod 3 1/2" Steel Bracket for 1 1/4" Rod 3 1/2" Steel Bracket for 1 3/4" Rod 3 1/8" Bracket Extension 3 1/8" Bracket Extension for 3/4" Bracket~Each 3 3/4" Return Resin Bracket 3 5/8" Center Support Bracket for 1 1/4" Rod 3 5/8" Steel Bracket for 1 1/4" Rod 3" Clearance Bracket for 3" Wood Drapery Rod~Each 3" Clearance Curtain Rod Bracket for 1 3/8" Wood Drapery Rods~Each 3" Clearance Joiner Curtain Rod Bracket for 1 3/8" Wood Drapery Rods~Each

3" Clearance Royal Bracket~Each 3" Projection Bracket for 1 1/2" Diameter Rod~Each 3" Projection Traverse Bracket for 1 1/2" Curtain Rod~Each 3" Return Single Bracket (wood tip)~Each 3" to 6 1/2" Adjustable/Extenable Bracket for 1" Rod~Each 3/4" Iron Adjustable Extendable Bracket~3" to 5" Return 3/4" Iron Adjustable Extendable Bracket~6" to 9" Return 3/4" Iron Adjustable Extendable Bracket~Extends 3 3/8" to 5 1/8" 3/4" Iron Bracket~2 7/8" Return 3/4" Iron Bracket~3 5/8" Return 3/4" Iron Double Bracket~2 1/2" & 5 5/8" Return 3/4" Iron Elbow Bracket 3/4" Iron Scroll Bracket 302 Inside Mount Socket Bracket~Each 308 Decorative Socket Bracket~Each 4 1/2" Return Resin Bracket 4 1/2" Return Resin Bracket for 3" Curtain Rod~Each 4 1/2" Return Steel Bracket 4 1/2" Return Wood Bracket for 3" Curtain Rod~Each 4" & 6"P Geo Techno Double Wall Bracket 4" Single Steel Curtain Rod Bracket for Rectangular Steel Drapery Rods~Each

4"P Geo Techno Wall Bracket 5 1/2" Curtain Rod Bracket ~ Each 5 3/4" Return Wood Bracket for 3" Curtain Rod~Each 5" & 8"P Double Wall Bracket 5" & 8"P Geo Techno Double Wall Bracket 5" & 8"P Wall Bracket 5" Clearance Single Bracket for 1" Rod~Each 5" Projection Bracket for 1 1/2" Diameter Rod~Each 5"P Geo Techno Wall Bracket 6 1/4" Double Steel Curtain Rod Bracket for Rectangular Steel Drapery Rods~EachSheffield Adjustable Rod & Brackets three (3) stepsSheffield Adjustable RodQtyColorSizeDecorative FinialsBasic End CapsQty ColorAdd to Basket This instructable will show you how to make strong, attractive and low cost curtain rods out of metal conduit. My goal was to make curtain rods similar to the Pottery Barn Standard Drape Rod but at a much lower cost. My biggest window needed a 106 inch bar which would have set me back $50 from Pottery Barn. Making my own rod using widely available EMT conduit ended up costing me less than $6.

Your biggest variance of cost will be determined by your method of making or purchasing the finials.Step 1: MaterialsShow All ItemsThe materials for this project are pretty simple and inexpensive:Here is my cost breakdown:Tools:« PreviousNext »View All Steps DownloadBrackets hold the rod in place. A correctly hung curtain rod starts with bracket placement. Knowing where to place the brackets to avoid extra wall holes or rods at an incorrect height for the curtains is an integral part of a successful installation. A bit of planning will ensure your success. Know the Parts Familiarize yourself with the bracket. Read the installation instructions and note the names of the parts of the brackets, how the bracket holds the rod and how the bracket attaches to the wall. Purchase screws, if not supplied, that fit into the screw paths of the brackets and purchase matching anchors if applicable. Measure the Drapes Measure the drapes or curtains from the bottom edge to the top of the rod pocket, top of the tab or top of the drapery pin and record this measurement as the “top” measurement.

The brackets must be installed at the correct height from the floor to ensure that rod attaches to this top measurement at the appropriate distance from the floor. For example, if the measurement from the drape's bottom edge to top of rod pocket measures 84 inches and the drapes must sit 1/2 inch above the floor, the top of rod must be 84 1/2 inches above the floor. The brackets must be installed at the height that places the top of rod at 84 1/2 inches from the floor. Calculate Bracket Placement Lay the bracket flat on a piece of paper with the base (the part that attaches to the wall) to your left. Trace around the bracket, creating a silhouette of the bracket. Draw a line perpendicular to the bracket base, immediately under it. Extend the line to the right side of the tracing, along what would be the underside of the bracket when attached to the wall. This is the bottom of bracket line. Note how the rod would sit in the bracket, identify where the bottom of the rod would be seated.

Mark the top of rod on the tracing as if the rod were sitting in the bracket. This top of rod measurement is equal to the diameter of the rod. Measure from this top of the rod mark on the tracing down to the bottom of the bracket line and note this as the top of rod adjustment figure. Subtract this measurement from the drape length to determine the wall position of the bottom of the bracket. For example, if the top of drape must be at 84 1/2 inches from the floor and the rod adjustment figure is 2, the bottom of bracket must be at 82 1/2 inches from the floor. If the curtains connect to rods with rings and eye screws, measure from the inside at the top of the ring to the inside bottom of the eye screw. The bottom inside edge of the eye screw must be at the top of drape measurement and may hang below the bracket base. If the ring measurement is greater than the measurement from the top of rod to the bottom of bracket, add the difference to the bracket placement. For example, if the top of drape must be at 84 1/2 inches from the floor, the ring measurement is 2 1/2 inches and the top of rod is 2 inches above the bottom of bracket, the bottom of bracket must be placed at 83 inches from the floor.